My Experiences In Education

Category: Free Inquiry Pottery Project

Last Day of Throwing and Last Batch of Finished Pieces

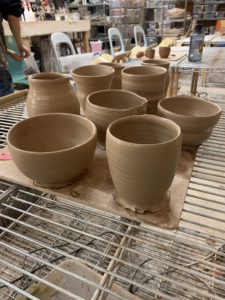
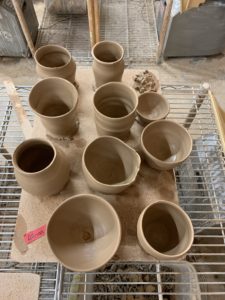
Monday was my last day of throwing for my inquiry project. I had a really successful day and I am very happy with the number of pieces I made in the two hour block. I decided not to make my large bowl this week, as I am going to give some of my pottery away for Christmas and I wanted to make some extra pieces in preparation. I threw 7 pots and 3 bowls. One of those pots and the small bowl is going to become a sugar bowl and lid for Goal 3! I ripped the side of one of the larger bowls I made this week but hopefully Ann will be able to fix it up for me before trimming next week. If not, I will just cut that section off and make a more shallow bowl than planned. I also experimented this week by adding designs to the wet clay instead of waiting for trimming day. I pressed a few stamps into the wet clay, which was much easier and faster than hand carving it during the trimming stage. I’ll have to see next week how it turns out!

side view of several light brown pots and bowls of various sizes on light brown cork board

birds eye view of 7 pots and 3 bowls, light brown clay on light brown cork board, various sizes

birds eye view


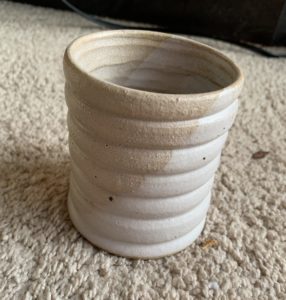
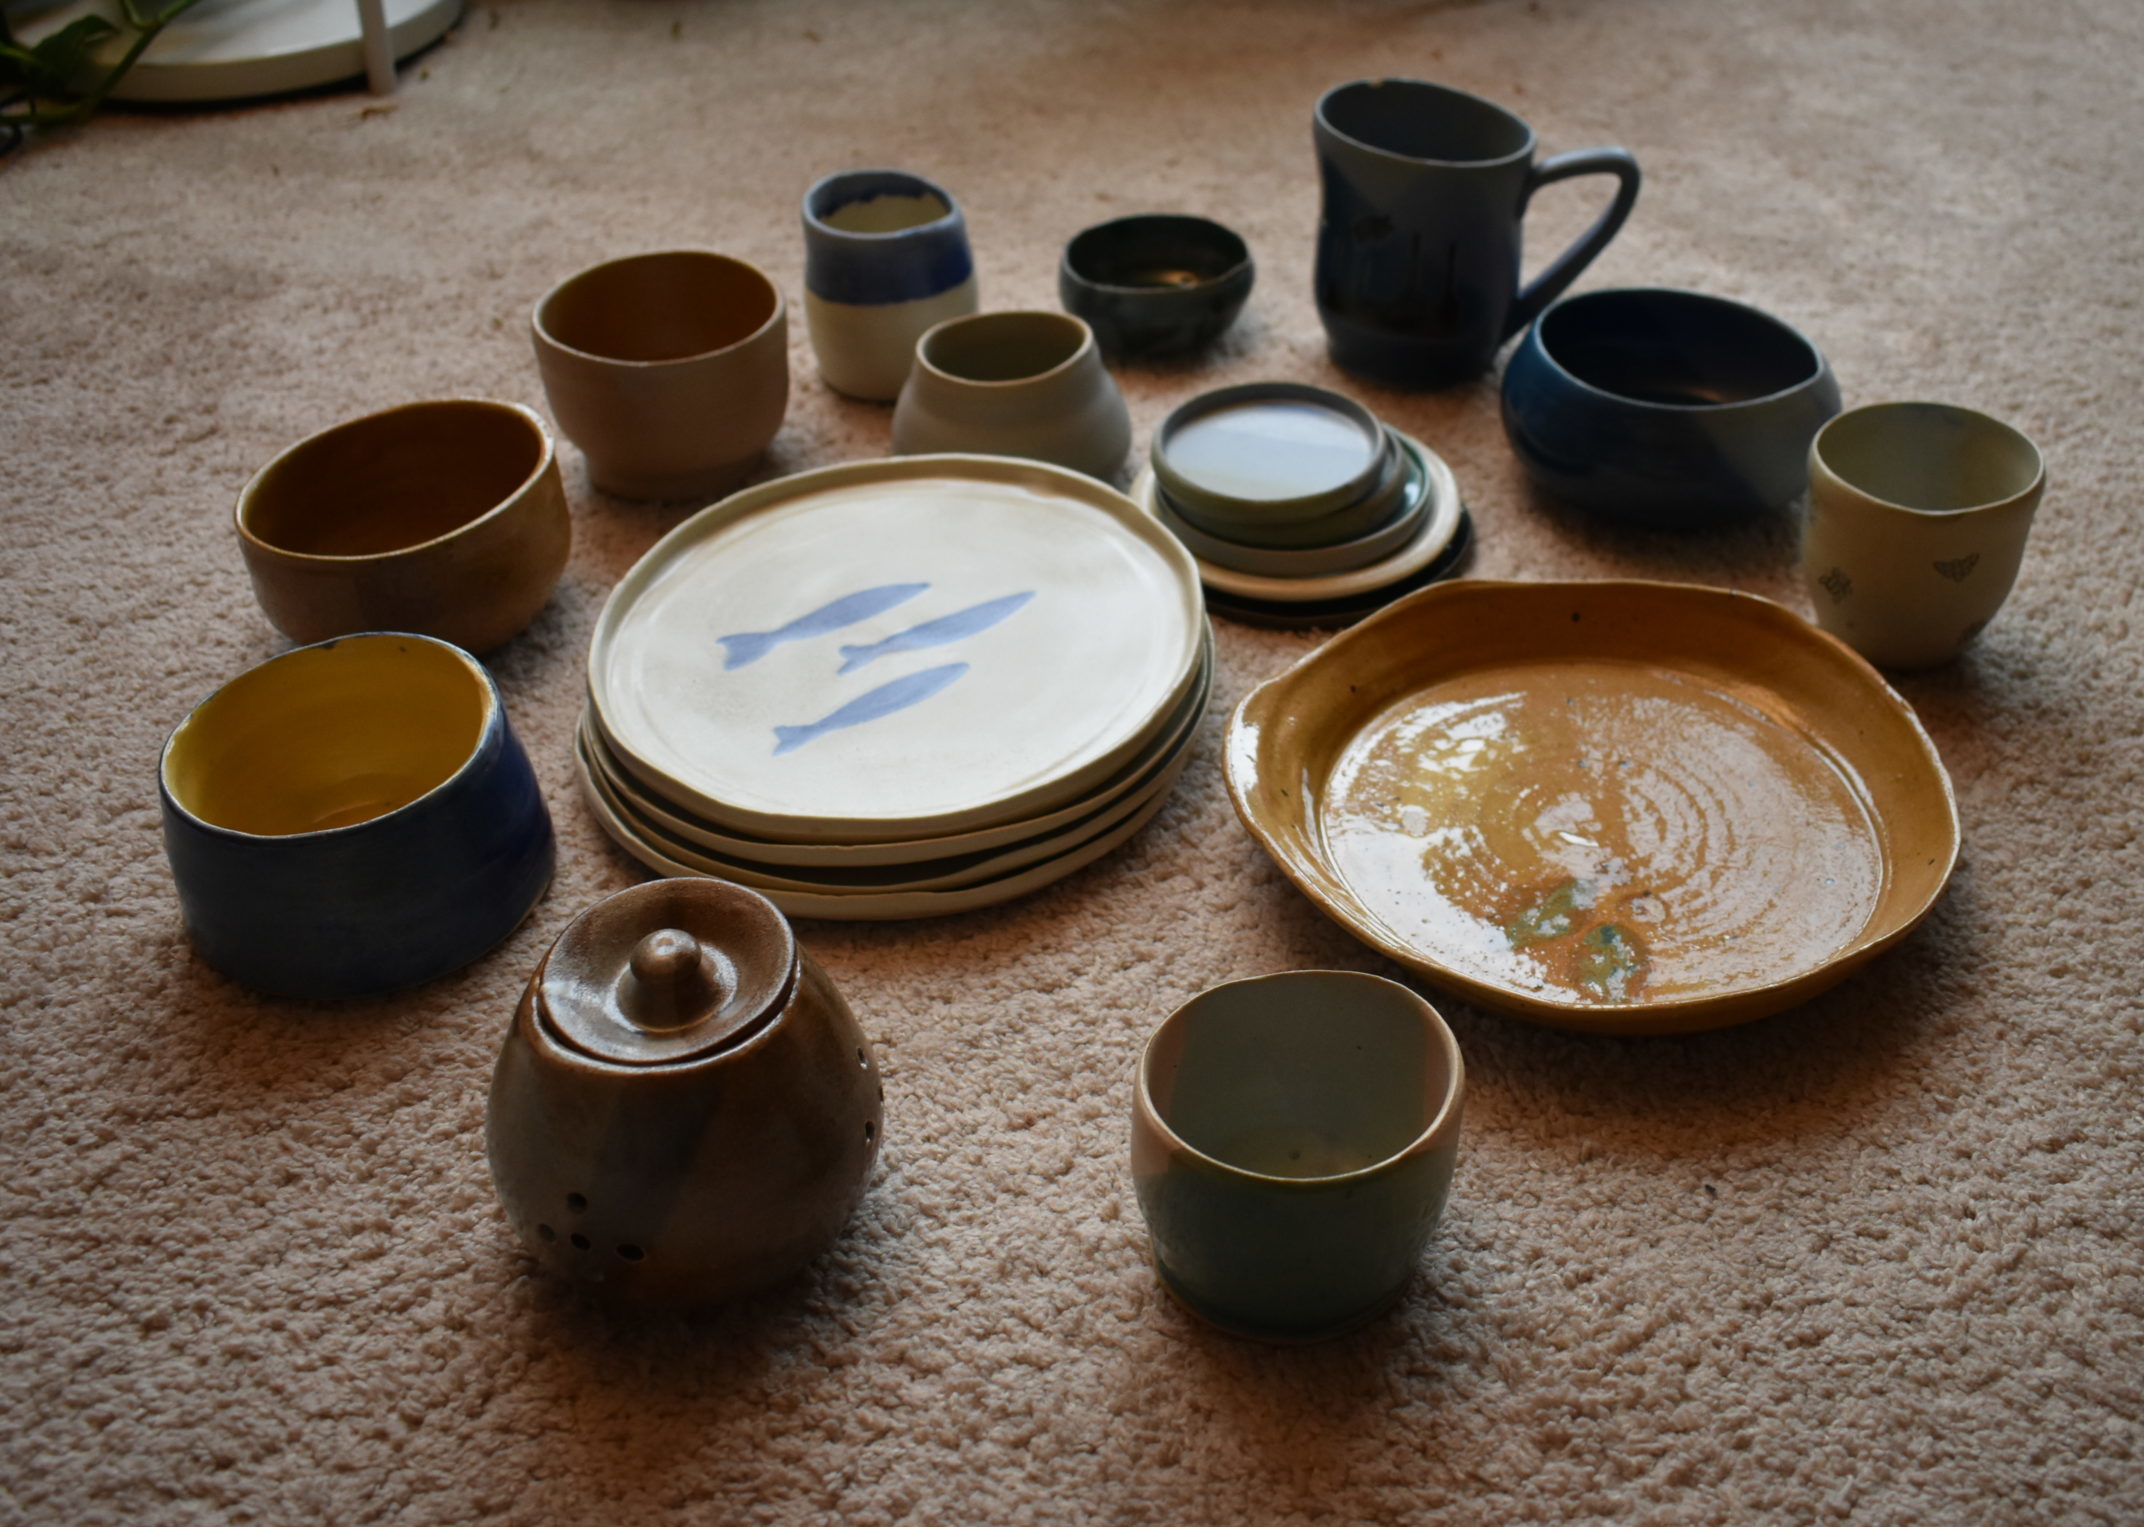
I also picked up my finished glazed pieces from the week before, and the glaze combinations with my flower pots came out better than my wildest dreams. This first piece is my honey hive cup for my friend. I hoped the glaze to turn out more pink, but the white has really nice coverage and the shape is still great.

light brown and white beehive style cup on brown carpet

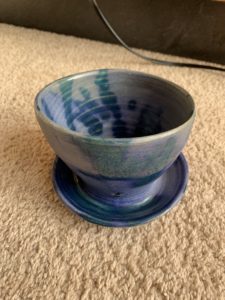
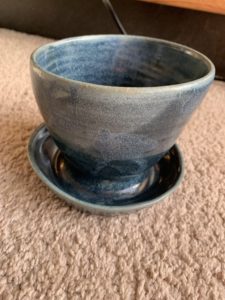
These first two flower pots had no additional carving or pattern but I made a beautiful pattern by splattering the glaze. The glaze also melted down the pots in the kiln adding to the unique design.

blue and green flower pot on carpet

slate blue flower pot on carpet


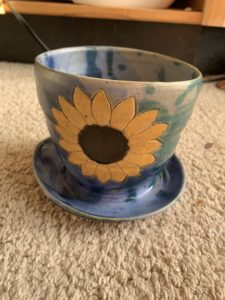
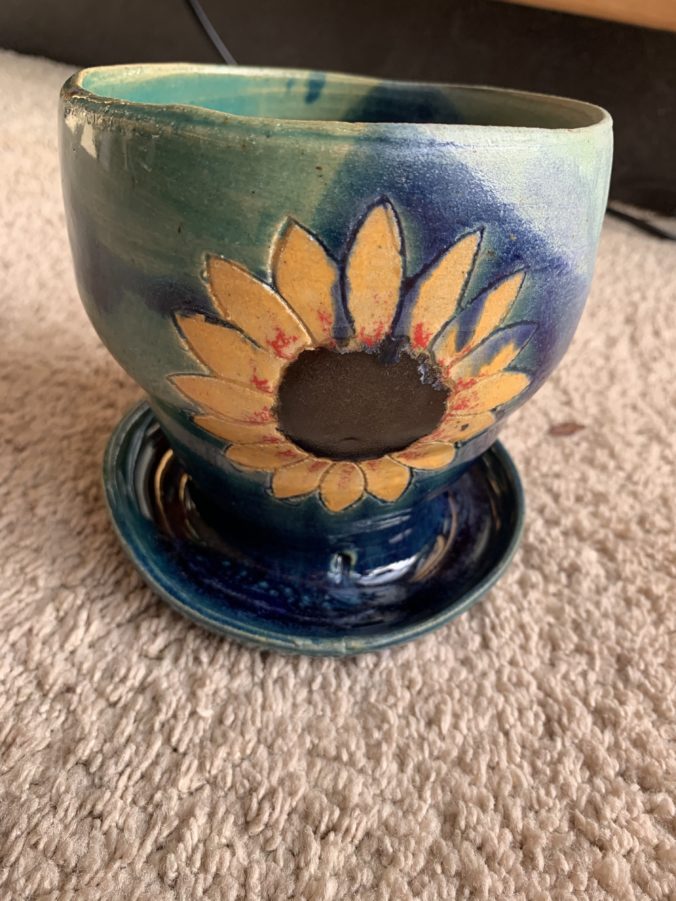
The second two flower pots I added a sunflower design. This takes a really long time to glaze as you have to paint on the glaze of the flower three times, and then cover it in a coating of wax before dipping the main pot. I tried adding a bit of red underglaze to one of the sunflowers to give the petals more character. It turned out beautifully! There was quite a bit of blue glaze dripping/melting however that went right over the petals, so next time I will be more careful with the splattering and avoid dripping blue above the sunflower.

flower pot with sunflower, splattered with blue and teal on carpet

flower pot with sunflower, blue and green colouring


I am excited for trimming my sugar bowl next week! Lids are very tricky and I have not attempted one for over a year, so I am looking forward to seeing how far I have progressed.

Glazing Tip: Write it down!

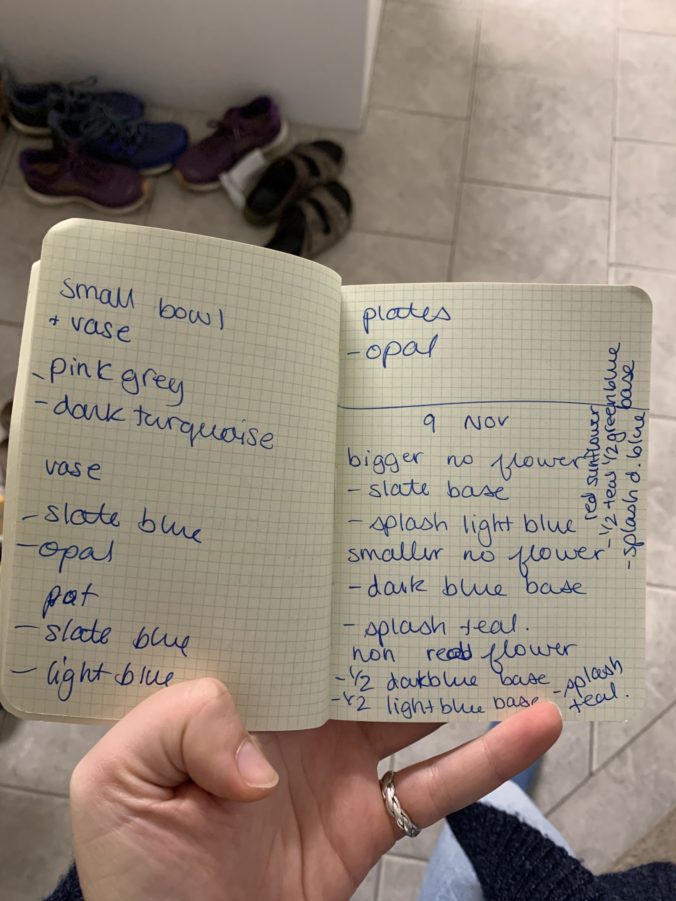
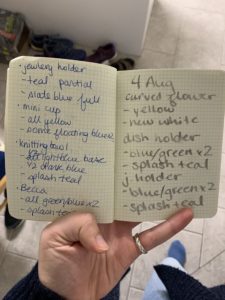
I was back to glazing this week to finish up those flower pots and the mug for my friend. Since I handed in the flower pot with the carved salamander late, it was not bisqued in time for glazing this week so I will do it the next time I have a batch! I experimented with some new colour combinations this week that I am very excited about. I find the blues and greens meld together beautifully in the kiln, resulting in almost a melted look. Whenever I glaze a piece, I write it down in a little book I have so I can track which combinations I like and which I do not like.

small book held in hand, blue cover with 3 types of whales, skeletons of whales below

glazing book

two pages within a small book detailing past glazing colours

past glazing choices


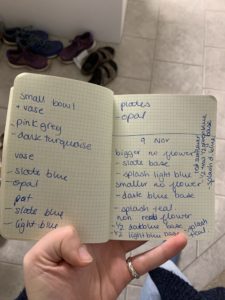
This is the page from this week.

inside two pages of glazing book detailing last weeks glaze chioces

this week’s choices

This Monday, I am going to have my last throwing day before the end of term. I am hoping to throw my large bowl for Goal 2, and try making a sugar bowl for Goal 3! Matching lids to containers is really tricky so this will be great practice while putting me out of my comfort zone .

Salamander Flower Pot

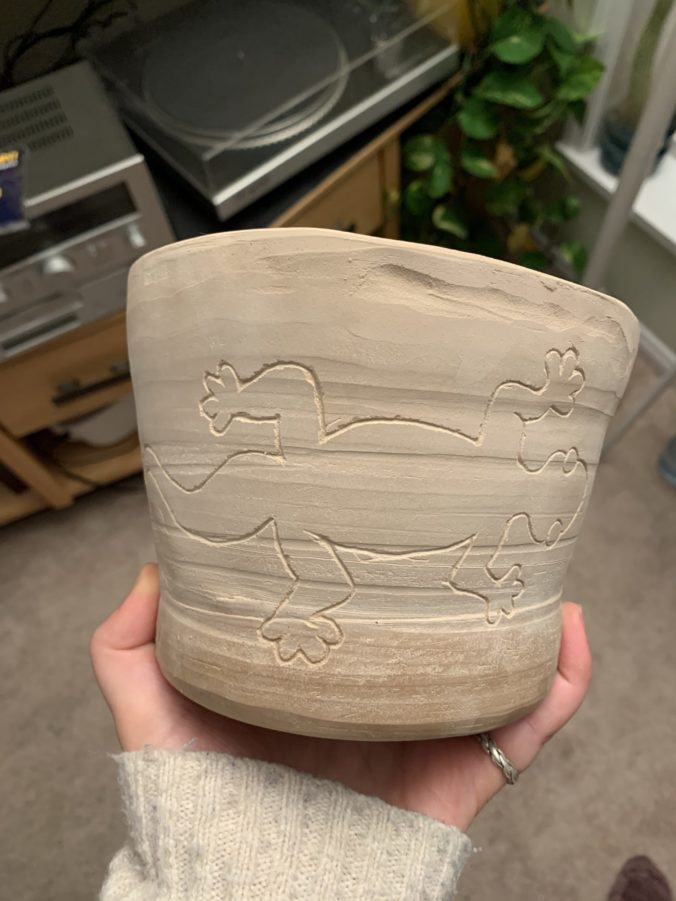
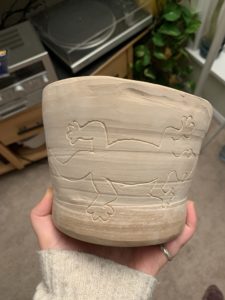
This week I finished trimming my 4 flower pots, one large pot and a small cup. Sometimes during this trimming stage, I carve designs into the sides of my pieces. This makes the designs look much clearer and  makes it easier to paint them with glaze. I carved a sunflower design into two of my flowerpots. This sunflower design is a classic of mine. Sunflowers are one of my favourite flowers and it is a quick design to carve now that I have done it several times. The small cup I trimmed into a honey pot shape, by request for a Christmas present for a friend. I ran out of time at the studio, so I decided to bring my large pot home with me to carve. I put a large salamander along the side of the pot, and I will bring it back to the studio tomorrow so it will be ready to glaze next Monday.

light brown pot held in hand with salamander carved into side of pot.

Finished Products!

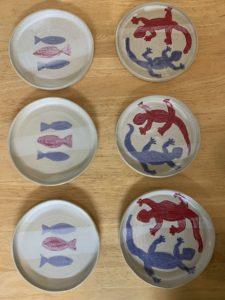
All the pieces I’ve been working on over the last month came out of the kiln this week! I am really happy with the results. I have completed part of Goal 1, which was to make 6 new plates for my own personal use similar in size and shape.

6 white plates, 3 with two blue fish and one red fish in the middle of the plates, 3 plates with one red salamander and one blue salamander chasing eachother's tails

new plates

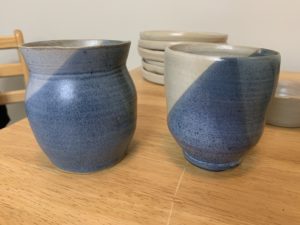
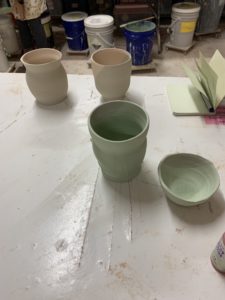
These next two pots/vases were simply practice for throwing, trimming and glazing. I really love the colours that turned out for these.

blue and white vases on wooden table

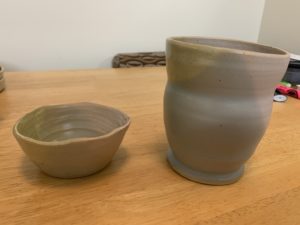
This little bowl was what I made when I tore a vase while throwing, and matched with the second vase I was experimenting with glazing colours.

small bumpy bowl in blue and white, bigger vase in blue and white as well on wooden table

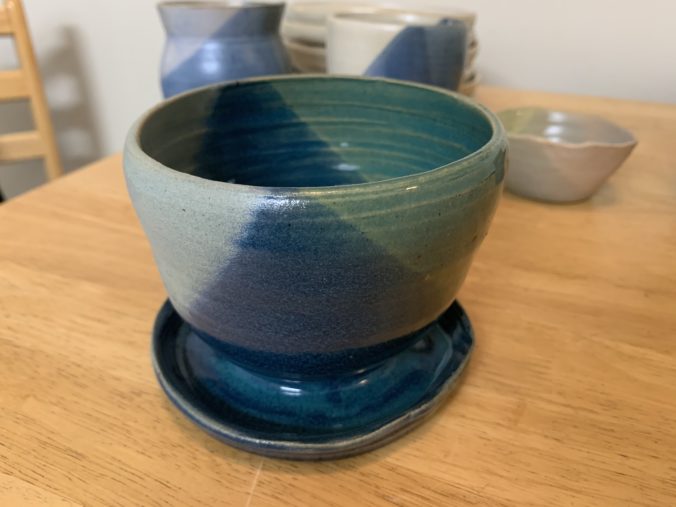
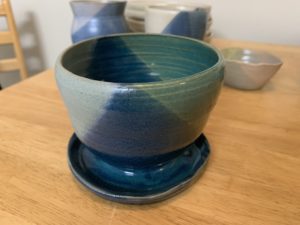
Finally, this was the trial run of my first of five flower pots! It turned out beautiful, it is one of my favourite glaze combinations.

blue and green flower pot outer view on wooden table

blue and green flower pot on wooden table, view is into the pot


I also threw 4 more flower pots this week and attempted to make a large pot. This will be the trial run for the large fruit bowl I am making for Goal 2. I will show them next week when I am trimming.

Glazing! Time to Add All the Pretty Colours

This week I glazed my freshly bisqued pottery with a bunch of lovely colours! My friend Sydney came with me again as the photographer.

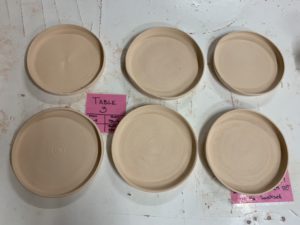
my six matching bisqued plates ready for glazing

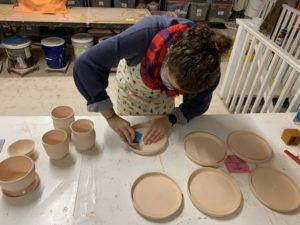
The first step in glazing is to sand any rough edges off your pieces with a bit of sandpaper.

sanding plates with three vases finished


After everything is smooth to the touch, wiping all the pieces with a damp sponge removes the dust so the glaze has a smooth, clean surface.


Now the fun part! Dipping your pieces in glaze or painting it on.

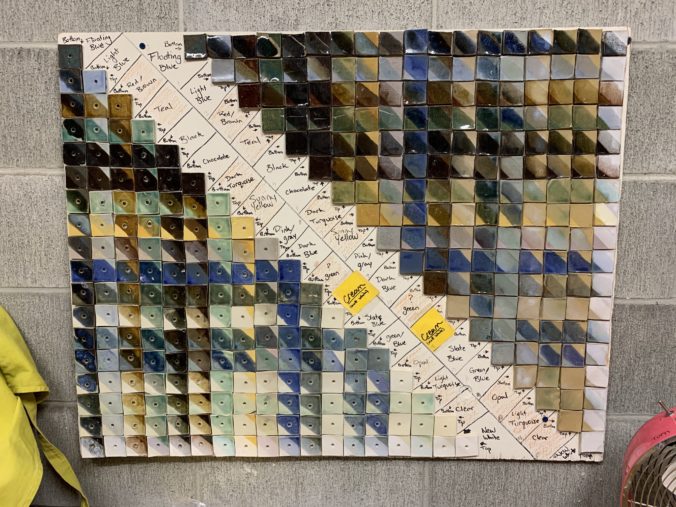
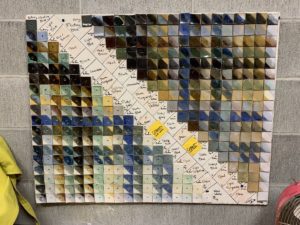
glaze wall, showing all finished colour combinations with two main types of clay

It is really important to stir buckets of glaze super thoroughly, or the particulate in the glaze will stay in the bottom and the coating of glaze will be thin and discoloured. Glaze should look creamy when it is properly mixed. When I first started pottery, I would be so mad after when I thought I was going to get a beautiful dark blue or green, and it would look thin and watery because I did not mix the glaze enough. The glaze also does not look anything like its colour when it is in liquid form. The next video shows stirring of dark blue, but the liquid glaze looks brown. The high heat of the kiln activates the chemicals in the glaze to show the beautiful colours.


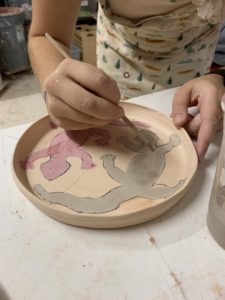
I started with my plates. I decided to paint on three fish with glaze on three of the plates for decoration, one red and two blue. When you paint on glaze, you need to do three coats to ensure the glaze shows up in the colour you want. When dipping pieces, more glaze is absorbed so just one dip per colour is necessary.


My other three plates I decided to draw and then paint on salamanders.


Once I had the time consuming pieces finished, I started dipping my flowerpot, 3 small pots and bowl.


Two pieces here have been double dipped and two are waiting for their second coat.

nearest pieces double dipped, far two pieces waiting second coat

One salamander will be blue and one will be red on each plate.

finishing blue glaze on salamander plate

Then I dipped my plates in opal, a clearish whiteish glaze that will make the rest of the plate smooth and give it a white colour while still letting my painted designs show through.


You must leave your pieces to dry before touching them or the glaze will come off on your hands, leaving a blank spot on your piece. Thinner pieces need longer to dry as there is not as much to soak up the glaze. I enjoy dipping my pieces in two colours, so you get a bit of both glaze, and the combination in the middle. Once your pieces are finished, you must wipe the bottoms clean. If you left glaze on the bottom of your pieces, they would fuse to the kiln.


This batch is now ready for the kiln! I keep a record of which glaze combinations I use in a little book so when they come out of the kiln, I know which combinations I love and which I do not like as much for the next time I am glazing. My small bottle of red glaze I bought for decoration, as Ann does not have any red glaze (apparently very difficult to make). All of these pieces will be food safe, dishwasher safe and oven safe! I tried some new combinations this week, I am excited to see how they turn out!


I used the same editing software iMovie as last week, and the same great jazz tune by KieLoKaz from Free Music Archive.

Meditation and Hunting for New Pottery Ideas

This week I decided to add in a small section of audio that I recorded during that crazy wind and rain storm on Tuesday. When I am inside on such a stormy day, it makes me feel warm and cosy, and I drink about 7 cups of tea. I find I will either be incredibly productive or read and nap all day. Luckily for the amount of homework we have, it was the former. I have been feeling really stressed about all of our due dates, and I have decided to try and incorporate a minute of meditation each day. If you are able to take some time out of your busy day, take a minute for a brief minute of meditation and listen to this audio recording of rain and wind.

Now, on to pottery. Yunomi studio was closed this Monday for Thanksgiving, so I took a week off and used some of that time to explore my third goal of my inquiry project: to make something brand new! I did a brief brainstorm with some family while consuming a huge dinner Monday afternoon. My current ideas are as follows, with attached videos of professionals accomplishing what I may attempt.

Butter Dish:


Cookie Jar:

Teapot

Currently I am leaning towards a butter dish or cookie jar. I love the idea of making a teapot, but I already have a beautiful teapot given to me by my mother, and I don’t really have the room for two teapots in my apartment. A cookie jar would be a great test of skill to make such a big jar, and lids are notoriously difficult to match. My partner’s father eats a lot of butter, and I know he would like a butter dish potentially as a Christmas present, so that could be two birds one stone. This Monday I will be glazing the pieces I started a few weeks ago, so I still have some time before my next day of throwing to make a decision. Add a comment if you have an idea of a new piece I could make!

Trimming Everything Down to Size

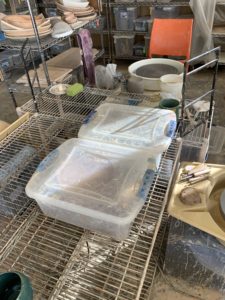
This week during my studio time, I trimmed all of my pieces that I threw last week! Trimming is when you cut or “trim” your pieces until they are the desired shape and size. Pottery at this stage is called greenware, and the clay is in the “leather hard” phase, so they have enough integrity to withstand shaping by metal tools. My lovely partner Graydon accompanied me this time to record my work at the studio. After you throw your pieces and they have dried some, Ann will put them in large tupperware containers so they all remain at the same level of hardness and prevents them from drying out too much.

Main focus is two large tupperware containers filled with pottery pieces from the week before. They are on a metal grid shelf. Pottery wheel is partially visible to the right of the photo.

two large tupperware containing pieces thrown last week

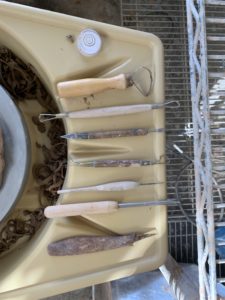
There are a large variety of tools to use to trim your pieces.

Trimming tools. From left to right: circular level, large wide mouthed tool, smaller tool with curved and square end, small tool with blade and pointed curved end, small tool with different types of curved ends, small tool with sharp pointy end, tool to make a circular hole, blade.

selection of trimming tools

I started out by trimming a pot. I always start by trimming the bottom first. A small level and some anchor clay helps make sure the pot is evenly balanced. I trim the bottom of excess clay and shape it towards the body of the piece with the wider mouthed tool. I then carve my initials and a flower stamp into the bottom of the piece for identification.

Then the pot is flipped over and anchored again. The inside and outer side are trimmed. That looks finished to me!

The next piece I trim is one of my 6 plates. For plates, you roll the anchor clay out into a log, and press it onto the wheel in the shape of the outer rim of your plate. Your plate can then be pressed into the anchor clay. I smoothed out the bottom and edges of the plate with the wide mouthed trimming tool.

I continue to trim the plate by hollowing out the top side of the plate with a variety of tools. Trimming plates can be a little mesmerizing, as coils of clay are trimmed off as you carve a spiral. I like plates to have an pronounced lip, so if you are eating something with sauce it does not spill off your plate!

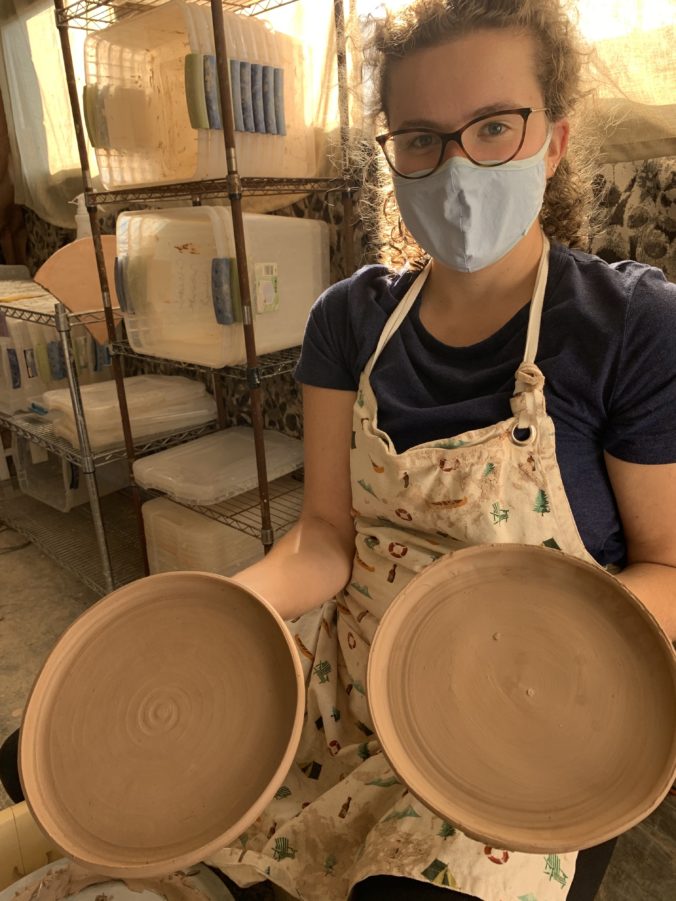
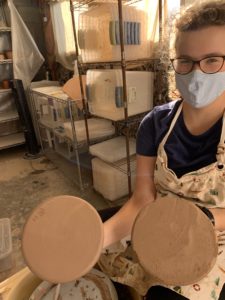
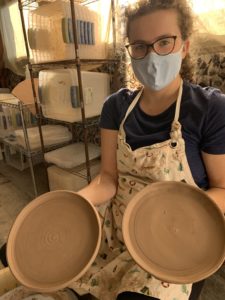
Here is a comparison of what a trimmed versus untrimmed plate looks like. You can see clean edges and the beautiful spiral design on the trimmed plate, whereas the untrimmed plate looks much more rough.

Myself holding two plates. Left plate has been trimmed, edges look very smooth, spiral pattern on bottom of plate. Right plate looks much more rough, no spiral. Some tupperware are visible in the background.

left trimmed, right untrimmed

Myself holding two plates. On the left, the top of the plate is shown to be trimmed, with clean edges and a spiral pattern on the face of the plate. The left plate looks much more rough, no spiral pattern

left trimmed, right untrimmed


My flowerpot with the attached dish is the next piece I trim. I am really happy with how this piece turned out!

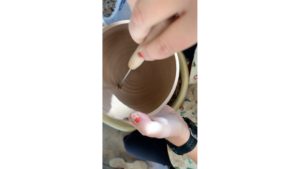
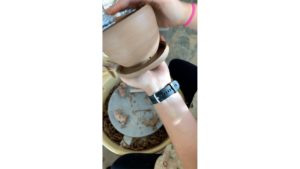
I punch out 3 small holes so that water can drain from the main pot into the attached dish.

Hand is holding tool to punch through. Other hand with watch on wrist is holding the pot in place. Background is indistinct.

beginning of drainage hole

two hands holding flower pot, new drainage hole is visible, pottery wheel is in the background

finished drainage hole


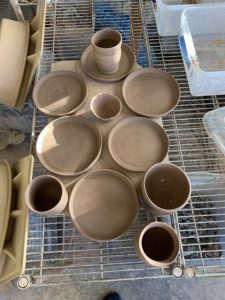
Overall, I trimmed 6 plates, a small bowl, a flowerpot with an attached dish and three small pots.

All finished trimming. 6 finished plates, 3 pots, a small bowl and a flower pot with attached dish. Finished pieces are on corkboard, which are on top of a wire shelf.

finished pieces

All of these pieces will go into the kiln this week to be bisqued! It will baked until it is strong enough to be handled, but porous enough that it will soak in glaze. Sometimes I also carve designs into my greenware pieces, but that often takes a long time and I had a lot of pieces I wanted to trim today.

I used the same editing software iMovie as last week, and the same great jazz tune by KieLoKaz from Free Music Archive.

Throwing Some New Stuff!

This week I started some new pieces! It was a beautiful sunny day on Monday, and my good friend Sydney came to the studio with me to record a few videos of myself throwing pottery. I warmed up first by making a few flower pots, then moved on to making 6 plates for Goal 1 of my Inquiry.

I bought a new bag of recycled clay from Ann. I prefer recycled clay, it is the result of all the scrap pieces from the studio that Ann mixes together, so it has a nice light brown colour. It is also half the price of a bag that is one colour. You can buy white clay, a darker brown clay and a bright red/terracotta coloured clay as well.
Three pieces of recycled lump clay. Light brown in colour, three heights in cascading order. Placed ontop of canvas covered table.

Three starting pieces of recycled lump clay.

I started off by portioning my chunks of lump clay by cutting them with wire and weighing them on a scale. You can weigh an old finished piece you have and then add a bit to get a ballpark idea of how much lump clay you need. I know that my flower pots typically weigh around 1.5lbs when in the starting stage because I make them so often, but I needed to weigh a finished plate to see that I would need about 2lbs of lump clay for my new plates.
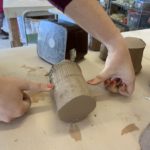
Portioning lump clay with a piece of wire. Clay is a light brown colour. Surface of the table is a brown canvas. Person is using thumbs to press wire down. Studio is in the background.

Portioning lump clay with wire cutter.

The next stage is wedging. The main reason to wedge your clay is to remove air pockets, which gives it a uniform consistency. It also makes the clay more pliable.


Once you have wedged all your chunks of lump clay that you want to throw in your session, you can move to your wheel. These wheels are super quick to set up.
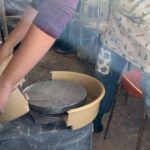
Putting the pottery wheel together. The wheel is made of a light yellow plastic, and they snap together on a metal circular base.

Snapping the two main piece of the wheel together.
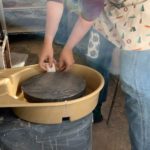
Adding small white clips to hold larger yellow pottery wheel together. Wheel is light yellow and secured on a circular metal base.

Securing wheel with clips.


The trickiest part of throwing pottery in my opinion is centering your clay on your wheel. This takes a ton of practice, and I was not consistently centering my clay for about the first six months of throwing. To start, you throw your lump clay as close to the middle as possible, but with some force so that it suctions onto the wheel. Add a bit of water to your piece, wet your hands well and crank up your wheel speed pretty high. Next, you anchor your elbows on your thighs, lean over your wheel, and bring the clay up into a column trying to keep as steady as possible. Push your thumbs slowly down until it is at the desired height. At this point you are mostly centered. To finish, push down from the top with one hand, and push towards the center from the side with your other hand with equal pressure. Knowing when it is properly centered is a feeling and just takes practice. If your piece is not centered, it is much more difficult to throw, as your clay is unevenly distributed. This makes it hard to make a symmetrical piece and the chance of it shearing off increases, as half your piece will be thinner. I’ve linked a great video by Earth Nation Ceramics that talks about how to center clay like a pro. This next timelapse video is an overhead view of myself centering a lump.


Now we are at the fun part, pulling! After my clay is centered I slow my wheel down quite a bit, as the faster I go at this stage the more likely I make mistakes. The better you get the faster you can go when pulling your clay up and out to the desired shape. When making something like a mug, flower pot, bowl, etc you start by pushing one finger into the center of your centered clay, down until you are about a half inch from the wheel base. Push your finger slowly outwards until you have enough room to work. Now you are slowly pulling your clay into its desired shape. Keep pressure on both sides of the piece as you pull. Make your piece as high as you want first, and then increase the diameter. It is much more difficult to bring up a wide piece than fatten out a tall skinny piece. Earth Nation Ceramics has another great video on how to pull. This flowerpot timelapse below is a bit more complicated because I am throwing it with a dish attached to the pot. A little piece of the clay around the outside is pushed down so I can shape a dish later and have it attached to the main pot.


Be careful not to make it too thin, or something like this will happen!


Mistakes happen in pottery, and its all about having fun and practicing. I turned that pot into a small bowl instead, and I save the piece that sheared off. Once it has dried out a bit, I can rewedge it with some other leftover pieces and start a brand new piece! After you have finished pulling your piece and you are happy with it’s shape, it is time to remove it from the wheel and place it on your cork board to dry out a bit. First you remove any water that is in the bottom of the piece. If you leave water inside your piece, over the next day the bottom of your piece would disintegrate back into watery clay, leaving you with a gaping hole or the collapse of your whole piece. Add a lot of water along the wheel to the outside of your piece, and then take your wire cutter and carefully run it along the surface of the wheel underneath your finished piece. You have to do this a few times, until you get water between the pottery and the wheel, to slide it off the wheel. Carefully pick your piece up holding it from the bottom and place it on your cork board. Done!


When throwing a plate, the method is a little different and much quicker. You still need start by centering your clay on your wheel. Then using the edge of your hand by your pinky finger, you slowly and firmly push down on a radius tangent until your plate is close to the desired size and thickness. A small tool called a rib is then pressed firmly to the plate back and forth at least 5 times from center to edge to smooth your plate and remove any air bubbles. After you are happy with the thickness and size of your plate, you can add a raised rim by pushing your thumb along the edge of your plate to the desired height.


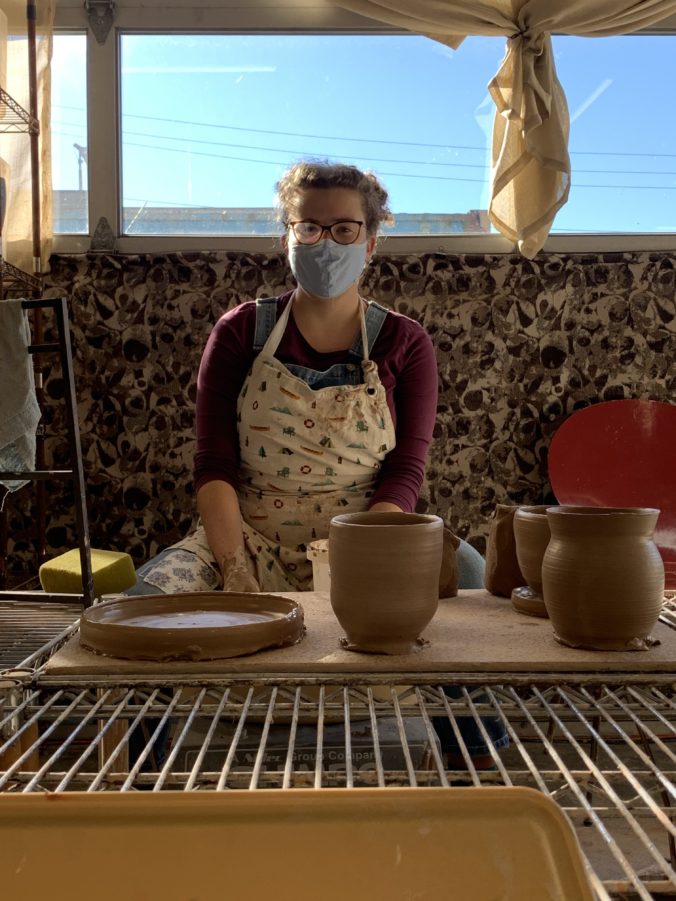
I made three normal flower pots, one pot with an attached dish, one small bowl and six dinner plates in my two hour session on Monday. Next week, the pieces will have dried to the “leather hard” stage. I will be able to finish the pieces with a variety of tools to be ready for their first trip to the kiln.
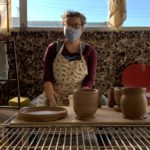
Image of Allison at Yunomi Studio. Pottery recently thrown is in the foreground, including a plate, 3 pots and some wedged clay lumps. A large window showing a sunny day is in the upper third of the photo. Allison is wearing a camping themed apron, red long sleeve shirt and blue jean overalls. She has brown curly hair and is wearing glasses and a blue face mask.

Midway through the afternoon, with a few finished thrown pieces.

Editing Video and Audio:

This week while preparing this post I learned a lot about editing video and audio, and I found some great resources to help. I used iMovie as I use a MacPro laptop. To convert my videos to a timelapse, I found a great article by Pro-Lapse to explain the process. A video from Maria Schlossberg showed me how to take a picture from my video in a freeze frame. VideoZeus explains how to merge video clips together, as I wanted to take a middle chunk out of one video but make my timelapse the same speed on both sides. Finally, I wanted some funky jazz music for the background of my videos! After learning so much about Copyright and music from the movie “A Remix Manifesto“, I chose to find an open source music site. Free Music Archive was inspired by Creative Commons and the open source software movement, and has thousands of songs to pick from a variety of genres. You can “tip” your artist if you want to pay, and every artist has a bio and links to their page to learn more. I chose this song by KieLoKaz.
A Brief History of Pottery

To start expanding my knowledge of pottery, I decided to research its origins and path throughout history.

I began with a quick search of my favourite podcast “Stuff You Should Know” hosted by Josh Clark and Charles W. “Chuck” Bryant to see if they had covered this topic. Unfortunately, they have not, but there is an excellent article on their home site HowStuffWorks called “How Pottery Works” by Emilie Sennebogen. The podcast and website are excellent ways to learn about a new topic, as information is shared in an engaging way. They employ humour and well researched, cited material to entertain and educate.

Pottery most likely started during the Neolithic Revolution, as hunters and gathers started to settle, farm and raise animals. They needed a storage solution that was better than a woven basket, especially for storing liquids. Clay is a common substance found around the world and it is easy to give it a basic shape by hand. Pottery was most likely discovered by accident, as someone left a chunk of clay in a large fire. The first forms of pottery were pots made from coils of clay built up from a circular base, smoothed out by hand and baked in a large bonfire.

Person is making a bowl by the coiling technique of pottery. About half of the pot has been made and smoothed out, and you can see some of the last rings of coils as they snake the next coil around the pot.

Coiling technique, photo by Andy Ward

The oldest ceramics found in Canada were from northern Yukon, and it is guessed that it was introduced around 1500 BC. They have similar designs and styles to the Siberian Neolithic. Ceramics did not however spread south from Yukon. Other artifacts in eastern Canada during this time period most resembles pieces found in Ohio and Illinois. Because of these implications researchers are able to us pottery to understand how populations travelled. Coiling techniques among North American Indigenous peoples were similar to those used in other cultures. Later, there is evidence that they used woven molds as a template. The coils of clay would be built around these molds, and then the outside would be paddled to smooth out and thin the walls of the container.

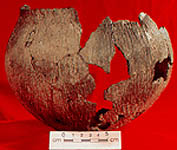
Fragmented pottery made by Sioux, colour is a light brown with lots of texture on the outside of the pot. The background of the image is red.

Pot made by Sioux, photo by Jean-Luc Pilon

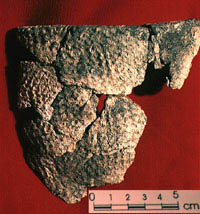
Fragments of an old piece of pottery recovered from Engigstciak site in Northern Yukon. It is golden brown in colour, in about 10 pieces loosely connected. There is a pattern on the outside that looks like a basket imprint. The background is red.

Recovered from Engigstciak site in Northern Yukon, photo by Jean-Luc Pilon

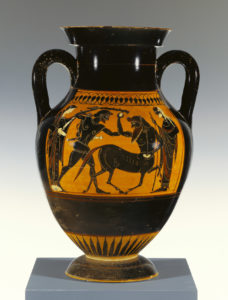
The next best invention in the world of pottery is the potter’s wheel. Prior to this, pottery built by hand was never perfectly round. It is most likely that around 3000 BC a basic revolving wheel, pushed by hand, was invented in Mesopotamia. The Greeks are attributed for establishing pottery as an art form. They were the first to introduce beautiful designs and colours through ingredients like ochre and potash. Over time, technological advancements like the electric wheel and better kilns allowed for more artistic expression along with practicality.

Large Greek storage jar, there is a motif on the central band of the jar showing a Greek man fighting a centaur, with two individuals flanking them. The background on the pot is a warm orange, and the characters are in black. Most of the pot including the handles and base are also black.

Greek storage jar, from J. Paul Getty Museum

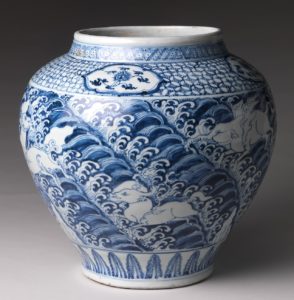
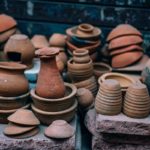
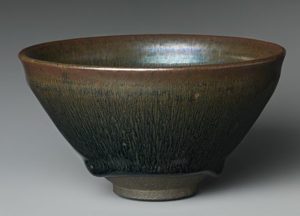
There are three types of clay in pottery: earthenware, stoneware and kaolin (or white). Earthenware is the most common, and most likely to be what the first potters used. I use this type of clay in my pottery.  Earthenware clay is porous and therefore needs a sealing glaze to be food safe or water proof. Stoneware is more robust and is fired at a higher temperature. You do not need to glaze this type as the high temperature turns it into a glass like substance that is water proof. Kaolin clay makes porcelain. It is much less elastic, making it more finicky than the other two types, but makes beautiful, delicate pieces.

Ming dynasty porcelain jar, blue images of waves and animals on a white background. The decoration is very intricate and delicate.

Ming dynasty porcelain jar, public domain

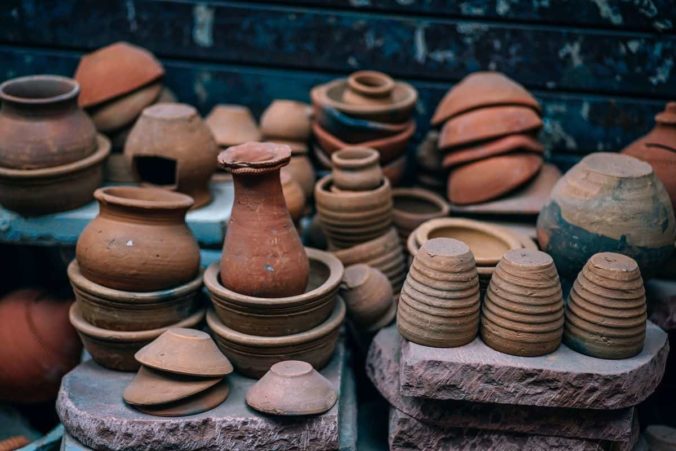
Multiple stacks of plates, saucers and flower pots made from earthenware clay, terracotta coloured on blue and red tables.

Earthenware, photo by Peter Deneen

Bowl made from stoneware, colours include green, brown, blue and yellow that have melted and melded together. The bowl is very well shaped and smooth.

Stoneware, from Edward C. Moore Collection


Pottery can be an expression of creativity, or a way to make a practical tool, but it is often a combination of both. This week, I decided to focus on the history of pottery, next week I am going to start throwing some pieces  to begin my first goal, plates and flower pots.

Resources:

Gascoigne, Bamber. “History of Pottery and Porcelain.” History World. http://www.historyworld.net/wrldhis/PlainTextHistories.asp?historyid=ab98

Sennebogen, Emilie. “How Pottery Works.” howstuffworks. https://home.howstuffworks.com/green-living/pottery1.htm

Birch, Samuel. (2015). History of Ancient Pottery. Cambridge University Press.

Pilon, Jean-Luc. “Pottery-Making Techniques”. Canadian Museum of History. https://www.historymuseum.ca/cmc/exhibitions/archeo/ceramiq/cerart5e.html

Passion for Pottery

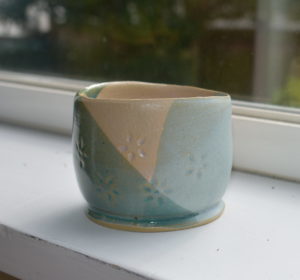
Small teal, white and blue homemade pottery cup with five etched flowers, cup is on white windowsill with window in the background

small cup with floral etching


Welcome to my Free Inquiry Project, where I plan on developing my passion for pottery!


In the summer of 2019, I decided to take a few pottery lessons at Yunomi studio in downtown Victoria. I had wanted to take lessons for years, and with a push from my loving partner Graydon (aka shove) I bit the bullet. After my first class I was hooked. I really enjoy having a creative outlet to make something so beautiful with my hands. I love the challenging physical nature of needing to push and struggle to center clay on my wheel, but then have gentle movements to shape it. The studio has huge windows that let in natural light, and the owner Ann is friendly, supportive, incredibly knowledgeable and skilled. The first thing I made was a flower pot. It is very thick and a little lopsided, but it is still one of my favourite pieces as it shows me how far I have come. I have experimented with plates (fun), mugs (fun), bowls (fun), garlic pots (tricky as heck) and many others. Over the past spring, the studio was shut down for three months due to COVID, and I really missed having it in my weekly routine. Once Ann was able to reopen with excellent safety standards, I dove back in. Over the summer I have been working to get back to the level I was pre COVID, and I am ready to start getting more adventurous and creative with my pieces again.

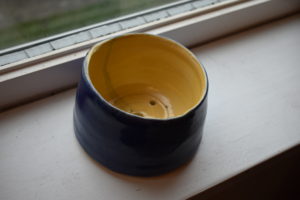
Small flower pot. Inside is sunny yellow, outside is dark blue, 4 drainage holes in bottom of pot. Pot is on white windowsill.

The first piece of pottery I ever made was this chunky, lopsided flower pot

For my inquiry project, I am going to focus on expanding my knowledge and understanding of pottery in all aspects. I am going research pottery’s place in world history and culture, as well as locally on Vancouver Island. I plan on watching a ton of youtube to improve my techniques and to spark new ideas for design. I am looking into purchasing some of my own tools like a glaze pen, to enable me to draw more intricate designs in glaze on my pieces. For a more dedicated project, I have three goals:

Goal 1: Part of pottery practice is making several pieces as close to identical as you can, so I am going to make a set of 6 plates and a set of 5 flower pots. I made a set of plates early in my learning, so I am excited to try again with better skill. I also like to give flower pots as gifts, and I could store them easier if I made them more similar in size.

Goal 2: One of my closest friends is getting married in May 2021 in an intimate wedding on her parent’s property. She and her fiancée have requested a large bowl as their wedding present. Large pieces are very challenging due to the amount of clay to shape, as well as difficulties glazing. I have only made one before, so I am likely going to do one more test run and then attempt their bowl.

Goal 3: Make something brand new I have never tried before! I am not quite sure yet what this will be, but with advice from Ann and the internet, I am going to broaden my horizons and try something fresh.