My Experiences In Education

Author: allisonseidel (Page 2 of 3)

Week 6 Reflection: PSII, Trello and Curation

Learning about Inquiry Based Teaching from Jeff Hopkins was very informative and eye opening. I’m not entirely sure how well I would have done at a high school like PSII. Having all that support all the time however would have been amazing for pursuing inquiry in a path I wanted. I would be worried that I would have done all Science or Biology themed inquiry and missed out on some of what I was “forced” to learn in Socials or English. It was really cool to use Hypothesis to annotate that blog post, I liked being able to see everyone else’s questions in preparation for the seminar. Hypothesis would be a great tool for a group of students to critique a published paper as a quick overview before writing a report. The ability to edit literally anything puts it apart from Google Docs or Track Changes in a Word doc, which have a more limited scope.

I do love the Trello format PSII uses for coursework organization. I am a big user of agendas and to do lists! It is just so satisfying to cross off what you have finished! I put literally everything I need to do or buy into a list and it’s been working for 26 years (perhaps more like the last 15). My favourite app for just a to do list is the Microsoft To Do, because it allows me to easily add categories and sync between devices. Trello however is great for school. I like that I can make a huge giant list of all my homework for the term, and the stuff I want to accomplish each week I can put into the doing category. I also like seeing what I have finished, which makes me feel very accomplished as slowly the left side gets smaller and the right side gets bigger. I will definitely continue to use Trello throughout the rest of this degree.


I had a look at Curation this week as well. I have been using Feedly a bit to try and increase my range of reading. It is too easy to go down a rabbit hole of Instagram where I feel like my brain is starting to melt. My favourite blog to follow on Feedly right now is the Lonely Planet Travel News. I love to travel (as so many people do) and since we really can’t right now, it’s fun to read and experience different places vicariously through the articles! For example, yesterday an article from James Gabriel Martin talked about how a Lord of the Rings filming location has been reopened to the public after 11 years! It’s not like I can go visit it any time soon but maybe one day now the option is there! Another good article was 6 bucket list destinations at risk of disappearance due to climate change. It was a great description of a lot of science on climate change while showing beautiful pictures of these amazing locations. I’ve learned to unfollow some blogs on Feedly as they rarely post new articles, and just follow the active accounts.

I am going to start using Diigo as a bookmarks method as well! Initially it looked like a combination of Hypothesis, Google Docs and bookmarks and I was not thrilled to use yet another Chrome extension. I soon realized how useful it would be for research papers however. I like where you can keep it as a private list and highlight useful sections for yourself! When I write a paper, I normally make a new folder within bookmarks to cite later, but it takes a while to find the section of the paper I wanted to focus on for my research when you have like 15 papers to use. When you can highlight a few paragraphs and attach a note it makes it simple to come back and reread the important parts of the paper you need.

Meditation and Hunting for New Pottery Ideas

This week I decided to add in a small section of audio that I recorded during that crazy wind and rain storm on Tuesday. When I am inside on such a stormy day, it makes me feel warm and cosy, and I drink about 7 cups of tea. I find I will either be incredibly productive or read and nap all day. Luckily for the amount of homework we have, it was the former. I have been feeling really stressed about all of our due dates, and I have decided to try and incorporate a minute of meditation each day. If you are able to take some time out of your busy day, take a minute for a brief minute of meditation and listen to this audio recording of rain and wind.

Now, on to pottery. Yunomi studio was closed this Monday for Thanksgiving, so I took a week off and used some of that time to explore my third goal of my inquiry project: to make something brand new! I did a brief brainstorm with some family while consuming a huge dinner Monday afternoon. My current ideas are as follows, with attached videos of professionals accomplishing what I may attempt.

Butter Dish:


Cookie Jar:

Teapot

Currently I am leaning towards a butter dish or cookie jar. I love the idea of making a teapot, but I already have a beautiful teapot given to me by my mother, and I don’t really have the room for two teapots in my apartment. A cookie jar would be a great test of skill to make such a big jar, and lids are notoriously difficult to match. My partner’s father eats a lot of butter, and I know he would like a butter dish potentially as a Christmas present, so that could be two birds one stone. This Monday I will be glazing the pieces I started a few weeks ago, so I still have some time before my next day of throwing to make a decision. Add a comment if you have an idea of a new piece I could make!

Multimedia and Modality in Learning

The SAMR model is a great way for educators to check themselves when trying to incorporate more tech into the classroom. There is so much pressure I am learning to be really tech savvy and to incorporate it as much as possible into your teaching moving forwards in education. If we are only reaching that first level of substitution however, all that energy going into changing modes is kind of worthless (and potentially a waste of money). For example, if you typically write out your notes for your students on the board, and switch to an overhead with a page of notes and lecture from that sheet, is it really that different? Yes you have technically included “tech” into your classroom, but you have not increased your multimodality in an effective way. Even changing that overhead to a powerpoint is quite close to substitution if all you do is lecture off the slides. At least with powerpoint you have a lot more options to get multimodal, by including video, audio, adding links to learn further, etc. I would classify powerpoint as augmentation as there is a lot of functional improvement and pathways towards redefinition. Initially I was having difficulty thinking of examples on ways to redefine common science concepts, but the additional reading by Hamilton et al., had some great suggestions. They talked about how you could shift teaching students about light from a diagram to an interactive computer simulation with variables the students can change. That made me think of a project I am doing for EDCI 767, where we analyze a science education app. My class partner and I are evaluating LifeMap, which is a really cool way of visualizing the “Tree of Life”. Learning about phylogenetics was a pretty boring topic for me in highschool, and this app gives you the ability to interactively explore the relationships between organisms and evolutionary history. This app to me is an example of modification as it represents significant task redesign.

I also read through the Multimedia Learning Theory. The Dual-Channel Assumption is a clear way to explain how humans take in information. Mayer (2009) states that you have a visual-pictorial channel (to process images through the eyes, including words) and an auditory-verbal channel (to process spoken words). The Redundancy Principle hit home for me as something educators have been teaching for a long time but perhaps without the explanation behind it on why it works so well. This principle states that messages are most effective when just spoken word and graphics. Often teachers include text and graphics on screen, and then speak as they are presenting. I remember this lesson from years ago, when I was taught “less is more” when putting text in powerpoint presentations. Teachers can overwhelm learner’s visual channels with words and pictures, and therefore slow down their ability to process and understand the information being presented. From a learner point of view, it is much easier to focus on the speaker’s voice for additional information than trying to take in paragraphs of text along with their speech. Allow your learners to have one source of information for their visual-pictorial channel with graphics (and a few keywords) and speech for their auditory-verbal channel.


The discussion we had on modality this week fits these topics well. More than ever we are having to find ways to adjust how we teach as distance and online learning becomes more and more prevalent. How can we best accommodate all learners in different circumstances, without relying on really expensive tech or overloading information on them as learners? Personally, I prefer face to face, perhaps as a result of 90% of my education being delivered in this format. I find I am able to best engage with the prof, my classmates and the class material when I have to go to a certain room and focus on that topic for an hour or so. A blended or hybrid mix of this could also be easily integrated by making some of the class hours online and synchronous especially in a tech class, as it allows you to follow along learning new software or programs on your device in real time. A big variable I find for myself is the time period. No matter how engaging a teacher tries to make a class, I start to check out after about an hr and half. Having the flexibility in online asynchronous classes help a lot since you can choose how long you are going to do that subject. Having multiaccess courses would be the most inclusive to the most learners, especially as teachers build up their online resources and tech skills so they can deliver those lessons with ease. As teachers evolve in their learning and teaching styles, multiaccess will allow so many different styles of learners from whatever location to study. At Claremont right now, there is a student who cannot come to school for health reasons. They have her zoom in each day on a chromebook, but there are definitely issues with audio during the lecture portion of the class. It would be awesome for her to be able to use the “cyber proxy” iPad or telepresence robot that drives around on wheels that we were discussing in 336 class. She clearly is very engaged with her learning and is striving to find a solution where she can participate in “normal” classes while staying safe. Fortunately, the teacher for the course I observed is striving to make sure she is included any way he can.

A general moto I am going to hold myself to through my teaching program and subsequent career is to make sure I continue learning and adapting. Seems like an obvious idea, but as life gets busy it will get easier to say to myself what I’ve been doing before is good enough. The teachers I see at Claremont that have great classes are the ones who are trying to learn new ways to incorporate tech, be more inclusive, and be adaptable in their teaching styles.

Week 4: Creative Commons and Podcasts!

Intellectual property, copyright and public domain include bimodal positions that both have strong arguments. In the film “A Remix Manifesto”, they look at copyright, creative commons and public domain and while they are biased coming from a pro creative commons standpoint do a great job of explaining both sides. The main artist they follow is Girl Talk, an individual who takes unauthorized samples from a huge variety of songs and makes his own remixed song. It is incredibly creative, and very popular. He does not see it as stealing, as he is making something new and very different from these sources. On the flip side, in one of the interviews, Lars Ulrich from Metallica is shown to be very upset about people illegally stealing his music. He argues this is his intellectual property. Throughout the movie however we see that the people that really benefit from locking up their content are very much driven by wanting the maximum amount of profit without really always giving credit or the money to the original artist. Disney is a great example. Disney has made billions of dollars reworking and animating stories that have been in the public domain for hundreds of years, for example Cinderella. Yet somehow, they do not see it as taking those stories and making a profit but consider them their own. Another great example is “Bittersweet Symphony by the Verve”. There has been a decades long battle with the Rolling Stones on how the Verve did get permission to use an orchestral section of the Stones song “The Last Time” but then claimed they took too much. The issue here is that the Rolling Stones based their song on a traditional gospel song that was sung by the Staple Singers. Sounds a little hypocritical to me.

One of the main reasons to be upset about someone taking your work is the lack of recognition however, and that can be accomplished through creative commons. I personally agree with creative commons as the way we should move forward as a society. We are striving to be a better connected global community, and it is so important for the betterment of everyone to “promote the free flow and growth of creativity and ideas” (Remix Manifesto). When looking on the Creative Commons website, they had an article posted about how they are calling on organizations to open their patents and copyrights freely available to fight COVID. This could be instrumental in finding a vaccine sooner. By using Creative Commons effectively, credit to the creator is still accomplished while allowing others to benefit from your work. Another great tool from them is the Creative Commons Search Browser Extension. This allows you to search for CC licensed images, download them and attribute the owner or creator! I also added a CC license to my blog, so others can share my content with credit. First you choose what type of license you want from CC, and then follow the instructions on the “Add a CC Mark to a WordPress Blog” and you are done!

My favourite quote from Remix Manifesto is “We are not passive consumers anymore, we create and collaborate”. The is the epitome of how our society is moving forward, and we better get on board.


I also had a closer look at our Social Media Competency this week. It was great to see the link towards “What Makes a Good Blog Post”, as since this is my first time blogging, tricks of the trades from the professionals is always welcome. The first point they make it to go look at everyone else’s blog! What do you like, what do you not like? I honestly had not really taken the time to spend a half hour exploring different classmate’s blogs and I had a great time. People are learning about so many interesting things! The biggest take home for me was the pictures and videos. That really drew me into the story they were telling about their inquiry. Hyperlinks are also an excellent way of incorporating a ton of information while still leaving the post as readable. Readers can choose how much they want to delve into each topic. When critically evaluating a topic or technology, they suggested using “CRAAP”  (Currency, Relevance, Authority, Accuracy and Purpose). Is your information up to date, do your links work, does it relate to the topic at an appropriate level? Where are your sources, is it reliable and truthful, are you being objective or is this an opinion piece? These are all excellent ways to keep your posts effective and concise.

Another section of Social Media on our forum was a discussion of Podcasts on Teaching and Learning! I love listening to podcasts (as I’m sure many of us do), and often listen when I am cleaning the house, biking downtown or gardening. One of my favourite podcasts as I mentioned on my second inquiry post is “Stuff You Should Know”. The co hosts are hilarious, research their material from reputable sources and take in corrections when necessary. When I started listening to them, I would cherry pick according to what I thought I was interested in, but after a while I just let the episodes run and learned so much fascinating stuff that I would have never picked! One excellent episode I just finished is “How the Electoral College Works” if you are looking for some clarity and understanding on how the US election works.

I would really like to be able to incorporate podcasts into teaching down the road. It gives students another avenue to get interested in class material or to learn more about something they learn in class. I like the look of “Brains On”, as their goal is to encourage curiosity about science and history, but I would want to listen to a few as it looks like it might be geared towards a younger age group. I also looked at “Tumble”. With titles like “The Science of Whiskers” and “Hamster Versus Bacteria” it seems like a great way to encourage casual, out of the classroom learning of science.


Trimming Everything Down to Size

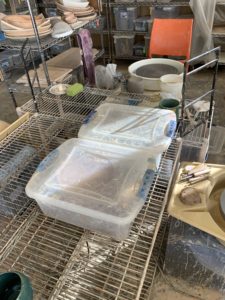
This week during my studio time, I trimmed all of my pieces that I threw last week! Trimming is when you cut or “trim” your pieces until they are the desired shape and size. Pottery at this stage is called greenware, and the clay is in the “leather hard” phase, so they have enough integrity to withstand shaping by metal tools. My lovely partner Graydon accompanied me this time to record my work at the studio. After you throw your pieces and they have dried some, Ann will put them in large tupperware containers so they all remain at the same level of hardness and prevents them from drying out too much.

Main focus is two large tupperware containers filled with pottery pieces from the week before. They are on a metal grid shelf. Pottery wheel is partially visible to the right of the photo.

two large tupperware containing pieces thrown last week

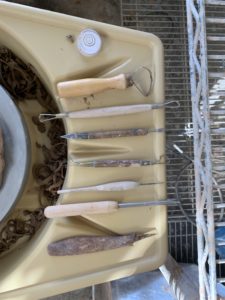
There are a large variety of tools to use to trim your pieces.

Trimming tools. From left to right: circular level, large wide mouthed tool, smaller tool with curved and square end, small tool with blade and pointed curved end, small tool with different types of curved ends, small tool with sharp pointy end, tool to make a circular hole, blade.

selection of trimming tools

I started out by trimming a pot. I always start by trimming the bottom first. A small level and some anchor clay helps make sure the pot is evenly balanced. I trim the bottom of excess clay and shape it towards the body of the piece with the wider mouthed tool. I then carve my initials and a flower stamp into the bottom of the piece for identification.

Then the pot is flipped over and anchored again. The inside and outer side are trimmed. That looks finished to me!

The next piece I trim is one of my 6 plates. For plates, you roll the anchor clay out into a log, and press it onto the wheel in the shape of the outer rim of your plate. Your plate can then be pressed into the anchor clay. I smoothed out the bottom and edges of the plate with the wide mouthed trimming tool.

I continue to trim the plate by hollowing out the top side of the plate with a variety of tools. Trimming plates can be a little mesmerizing, as coils of clay are trimmed off as you carve a spiral. I like plates to have an pronounced lip, so if you are eating something with sauce it does not spill off your plate!

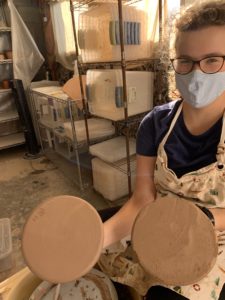
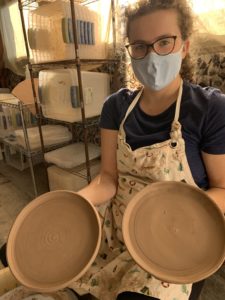
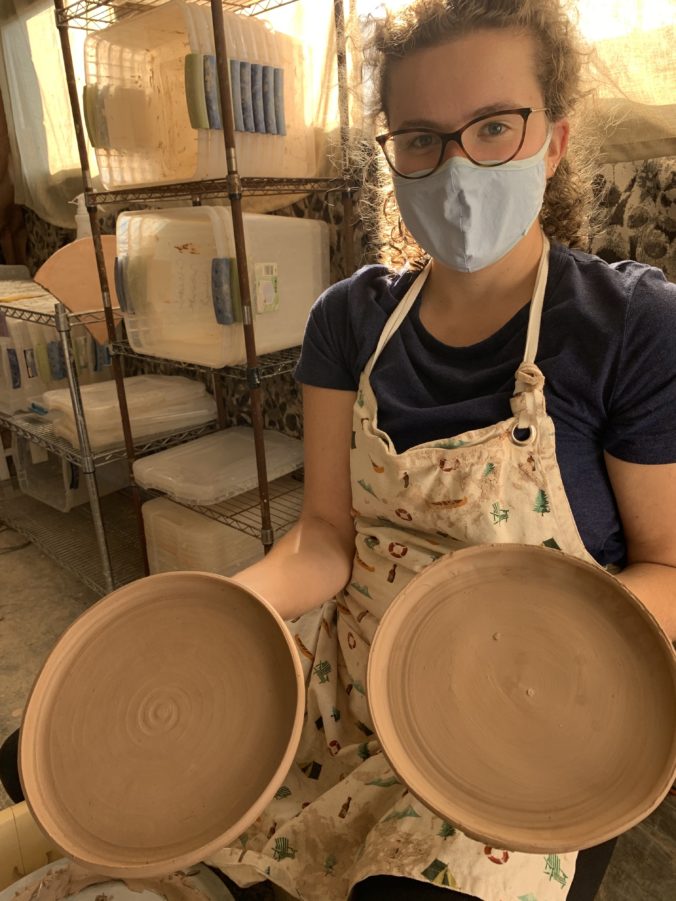
Here is a comparison of what a trimmed versus untrimmed plate looks like. You can see clean edges and the beautiful spiral design on the trimmed plate, whereas the untrimmed plate looks much more rough.

Myself holding two plates. Left plate has been trimmed, edges look very smooth, spiral pattern on bottom of plate. Right plate looks much more rough, no spiral. Some tupperware are visible in the background.

left trimmed, right untrimmed

Myself holding two plates. On the left, the top of the plate is shown to be trimmed, with clean edges and a spiral pattern on the face of the plate. The left plate looks much more rough, no spiral pattern

left trimmed, right untrimmed


My flowerpot with the attached dish is the next piece I trim. I am really happy with how this piece turned out!

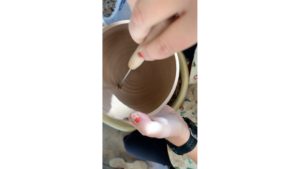
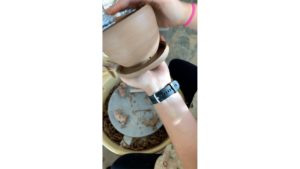
I punch out 3 small holes so that water can drain from the main pot into the attached dish.

Hand is holding tool to punch through. Other hand with watch on wrist is holding the pot in place. Background is indistinct.

beginning of drainage hole

two hands holding flower pot, new drainage hole is visible, pottery wheel is in the background

finished drainage hole


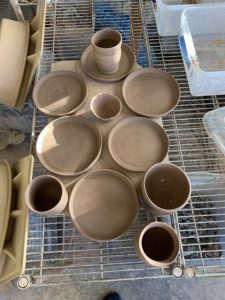
Overall, I trimmed 6 plates, a small bowl, a flowerpot with an attached dish and three small pots.

All finished trimming. 6 finished plates, 3 pots, a small bowl and a flower pot with attached dish. Finished pieces are on corkboard, which are on top of a wire shelf.

finished pieces

All of these pieces will go into the kiln this week to be bisqued! It will baked until it is strong enough to be handled, but porous enough that it will soak in glaze. Sometimes I also carve designs into my greenware pieces, but that often takes a long time and I had a lot of pieces I wanted to trim today.

I used the same editing software iMovie as last week, and the same great jazz tune by KieLoKaz from Free Music Archive.

Throwing Some New Stuff!

This week I started some new pieces! It was a beautiful sunny day on Monday, and my good friend Sydney came to the studio with me to record a few videos of myself throwing pottery. I warmed up first by making a few flower pots, then moved on to making 6 plates for Goal 1 of my Inquiry.

I bought a new bag of recycled clay from Ann. I prefer recycled clay, it is the result of all the scrap pieces from the studio that Ann mixes together, so it has a nice light brown colour. It is also half the price of a bag that is one colour. You can buy white clay, a darker brown clay and a bright red/terracotta coloured clay as well.
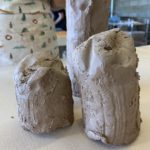
Three pieces of recycled lump clay. Light brown in colour, three heights in cascading order. Placed ontop of canvas covered table.

Three starting pieces of recycled lump clay.

I started off by portioning my chunks of lump clay by cutting them with wire and weighing them on a scale. You can weigh an old finished piece you have and then add a bit to get a ballpark idea of how much lump clay you need. I know that my flower pots typically weigh around 1.5lbs when in the starting stage because I make them so often, but I needed to weigh a finished plate to see that I would need about 2lbs of lump clay for my new plates.
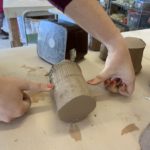
Portioning lump clay with a piece of wire. Clay is a light brown colour. Surface of the table is a brown canvas. Person is using thumbs to press wire down. Studio is in the background.

Portioning lump clay with wire cutter.

The next stage is wedging. The main reason to wedge your clay is to remove air pockets, which gives it a uniform consistency. It also makes the clay more pliable.


Once you have wedged all your chunks of lump clay that you want to throw in your session, you can move to your wheel. These wheels are super quick to set up.
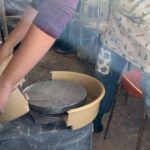
Putting the pottery wheel together. The wheel is made of a light yellow plastic, and they snap together on a metal circular base.

Snapping the two main piece of the wheel together.
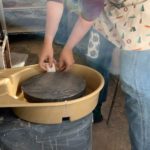
Adding small white clips to hold larger yellow pottery wheel together. Wheel is light yellow and secured on a circular metal base.

Securing wheel with clips.


The trickiest part of throwing pottery in my opinion is centering your clay on your wheel. This takes a ton of practice, and I was not consistently centering my clay for about the first six months of throwing. To start, you throw your lump clay as close to the middle as possible, but with some force so that it suctions onto the wheel. Add a bit of water to your piece, wet your hands well and crank up your wheel speed pretty high. Next, you anchor your elbows on your thighs, lean over your wheel, and bring the clay up into a column trying to keep as steady as possible. Push your thumbs slowly down until it is at the desired height. At this point you are mostly centered. To finish, push down from the top with one hand, and push towards the center from the side with your other hand with equal pressure. Knowing when it is properly centered is a feeling and just takes practice. If your piece is not centered, it is much more difficult to throw, as your clay is unevenly distributed. This makes it hard to make a symmetrical piece and the chance of it shearing off increases, as half your piece will be thinner. I’ve linked a great video by Earth Nation Ceramics that talks about how to center clay like a pro. This next timelapse video is an overhead view of myself centering a lump.


Now we are at the fun part, pulling! After my clay is centered I slow my wheel down quite a bit, as the faster I go at this stage the more likely I make mistakes. The better you get the faster you can go when pulling your clay up and out to the desired shape. When making something like a mug, flower pot, bowl, etc you start by pushing one finger into the center of your centered clay, down until you are about a half inch from the wheel base. Push your finger slowly outwards until you have enough room to work. Now you are slowly pulling your clay into its desired shape. Keep pressure on both sides of the piece as you pull. Make your piece as high as you want first, and then increase the diameter. It is much more difficult to bring up a wide piece than fatten out a tall skinny piece. Earth Nation Ceramics has another great video on how to pull. This flowerpot timelapse below is a bit more complicated because I am throwing it with a dish attached to the pot. A little piece of the clay around the outside is pushed down so I can shape a dish later and have it attached to the main pot.


Be careful not to make it too thin, or something like this will happen!


Mistakes happen in pottery, and its all about having fun and practicing. I turned that pot into a small bowl instead, and I save the piece that sheared off. Once it has dried out a bit, I can rewedge it with some other leftover pieces and start a brand new piece! After you have finished pulling your piece and you are happy with it’s shape, it is time to remove it from the wheel and place it on your cork board to dry out a bit. First you remove any water that is in the bottom of the piece. If you leave water inside your piece, over the next day the bottom of your piece would disintegrate back into watery clay, leaving you with a gaping hole or the collapse of your whole piece. Add a lot of water along the wheel to the outside of your piece, and then take your wire cutter and carefully run it along the surface of the wheel underneath your finished piece. You have to do this a few times, until you get water between the pottery and the wheel, to slide it off the wheel. Carefully pick your piece up holding it from the bottom and place it on your cork board. Done!


When throwing a plate, the method is a little different and much quicker. You still need start by centering your clay on your wheel. Then using the edge of your hand by your pinky finger, you slowly and firmly push down on a radius tangent until your plate is close to the desired size and thickness. A small tool called a rib is then pressed firmly to the plate back and forth at least 5 times from center to edge to smooth your plate and remove any air bubbles. After you are happy with the thickness and size of your plate, you can add a raised rim by pushing your thumb along the edge of your plate to the desired height.


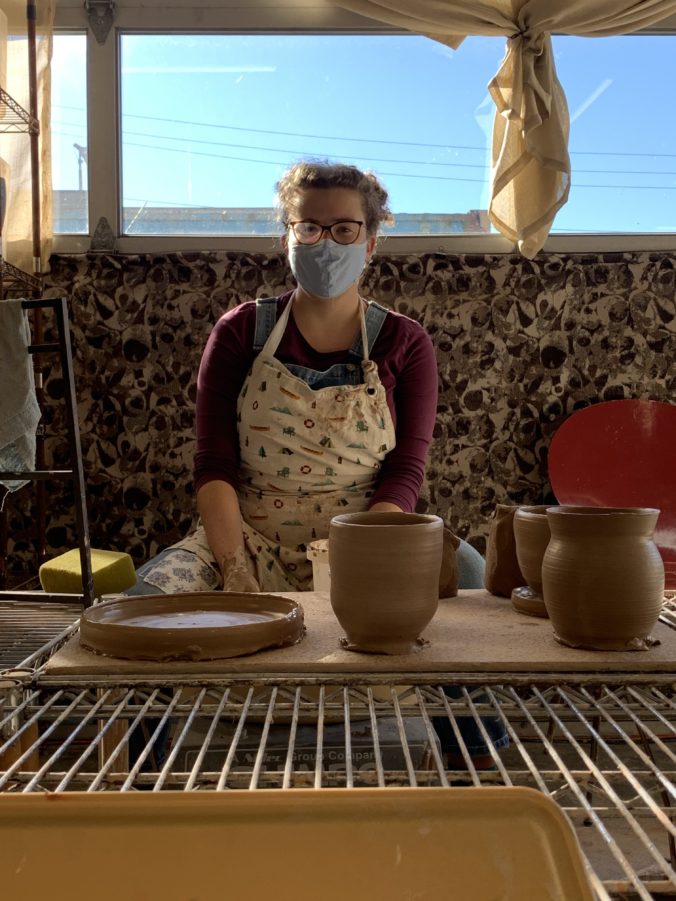
I made three normal flower pots, one pot with an attached dish, one small bowl and six dinner plates in my two hour session on Monday. Next week, the pieces will have dried to the “leather hard” stage. I will be able to finish the pieces with a variety of tools to be ready for their first trip to the kiln.
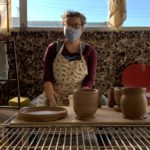
Image of Allison at Yunomi Studio. Pottery recently thrown is in the foreground, including a plate, 3 pots and some wedged clay lumps. A large window showing a sunny day is in the upper third of the photo. Allison is wearing a camping themed apron, red long sleeve shirt and blue jean overalls. She has brown curly hair and is wearing glasses and a blue face mask.

Midway through the afternoon, with a few finished thrown pieces.

Editing Video and Audio:

This week while preparing this post I learned a lot about editing video and audio, and I found some great resources to help. I used iMovie as I use a MacPro laptop. To convert my videos to a timelapse, I found a great article by Pro-Lapse to explain the process. A video from Maria Schlossberg showed me how to take a picture from my video in a freeze frame. VideoZeus explains how to merge video clips together, as I wanted to take a middle chunk out of one video but make my timelapse the same speed on both sides. Finally, I wanted some funky jazz music for the background of my videos! After learning so much about Copyright and music from the movie “A Remix Manifesto“, I chose to find an open source music site. Free Music Archive was inspired by Creative Commons and the open source software movement, and has thousands of songs to pick from a variety of genres. You can “tip” your artist if you want to pay, and every artist has a bio and links to their page to learn more. I chose this song by KieLoKaz.
Web Accessibility, Privacy and Safety

Web Accessibility

When I read about Web Accessibility this week, it really opened my eyes to something that I had not really thought about before. I have been an Adaptive Swim Instructor for many years, and I have worked with many individuals with various disabilities. I thought I had a good understanding of opening my eyes to barriers but it did not cross my mind that the internet would be a place that was not already fully accessible. You can access so many amazing tools through the internet that reduce and remove barriers globally. So often I feel like we rely on technology to reduce barriers around accessibility. For example one young girl I used to nanny spoke through an IPad like device as she was non verbal. Tech for her was crucial for her communication. After reading about Web Accessibility, I’m understanding that I need to treat the web as separate from tech in this regard, and that there are lots of things I will make sure to do in future posts to make my blogs fully accessible. I learned how to add “img alt text” through UVic’s Web Accessibility page. Now all of my pictures and videos uploaded to my blog will have full descriptions available for someone visually impaired.

Another great tip from that site was to ensure your test is left-justified, making it easier to read. On Kim Ashbourne’s Research Hub blog, I learned about this cool Chrome Extension called Read Aloud: A Text to Speech Voice Reader. This can be really useful for every user. Kim talks about how when her eyes are tired, she uses this extension to still read but give her eyes a break. It also highlights the word as it is read, so language learners and students with reading challenges can follow along with the audio. I then read about another blog from UVic called Remote Teaching Resources that describes how to make Accessible Content for Online Learners, which is so crucial right now as everyone has shifted to at least partial online content for teaching. They have a ton of resources to best support your students and make your teaching more accessible. There will always be more to learn on this subject as the internet and learners change and evolve, but as educators it’s our job to keep up!

Privacy and Safety

I want to focus specifically on Privacy and Safety from Jesse Miller’s talk. Privacy and safety are two huge buzzwords when talking about anything from politics to personal lives, but especially as teachers for ourselves and our students. I find that the more I learn about privacy and safety on the internet, the more paranoid I get, leading me to triple check my security settings, but it is so much more. As teachers, we lead quite public lives and need to be so careful about our online presence. High school students in particular are rather proficient at googling their teachers. We learned in the beginning of EDCI 336 to make sure we had high privacy settings for anything we wanted private, and to be the epitome of professional in the public sphere.

Through reading the BC Cloud Computing Guidelines, I was reminded of some important things to take into consideration when using internet and apps in the classroom. Remembering to research the company before you start using it, how the company makes money, where their headquarters are and where the data is stored are crucial before making a decision on which service to use. The EU has quite stringent privacy laws, making them a safer option that somewhere like the USA if that is where the headquarters or data is stored, as those companies are more likely to be honest and held accountable. As a teacher, we are responsible for our students if we are encouraging or asking them to use a certain app or software that we have done our due diligence and protect them. There are some really cool resources for teachers and parents by the Office of the Privacy Commissioner of Canada that give lesson plans, tips and tricks, and conversations to have with youth about privacy and safety online. I definitely have a lot to learn about protecting myself and my future students, but just like accessibility, these are super important skills that I will continue to learn and implement.

Zooming Around With a Bit of Twine

This week, I am finding myself struggling to adjust to the amount of time I am spending in front of a screen, specifically on Zoom. I have been out of university for a while, and I believe that part of this struggle is adjusting to spending more time sitting in general. My job as a lifeguard, swim teacher and aquafit instructor previously was very physical. I spent the majority of my day moving while I was at work. Now that I am sitting at a desk for 8-10ish hours a day, my body is a little grumpy with me. When it comes to Zoom, I also feel mentally exhausted. When starting this program, I did not think there would be such a difference in how I was feeling, comparing sitting in in-person classes to an online class.

This fatigue is a common complaint that I hear from many of my classmates and others as the world has shifted to Zoom in a response to COVID. I did some research to find out why I felt this way, and how I could make it better. In an article from Libby Sander and Oliver Bauman, I got some great information. We are missing a lot of non-verbal cues that would be present in person. To compensate for this, you must focus much more on the words people are saying. Since everyone can see your face in a close-up window, you feel the need to look interested and engaged, resulting in sustained eye contact. You can feel like you are performing while on camera, as there is a continuous display of your own live image, which of course is not present off line. Another factor is what environment you are Zooming in from. Is it quiet, do you have a personal workspace set up, does it look neat and tidy, do you have a comfortable chair? I decided this week to add a background, so that I did not have to worry about what my workspace looked like behind me, or if my partner has to come in unexpectedly. I chose a picture of trees that I took on a camping trip this summer, which always reminds me of a great memory while looking professional and hopefully calming to others looking at my screen.

I really appreciate that most of my professors in this program are very aware of Zoom fatigue and are striving to reduce our synchronous time to around one hour each session. I find that I am able to be engaged and interested in the subject content of the call when it is that short. One solution for myself is that I am going to start turning off my camera when my professors are using screenshare and going over a powerpoint, and saving my energy for discussions when I really do want to be engaged, and looking at my classmate’s faces.

I found another great article by Melissa Pandika, who lists all her sources at the bottom of her page. Staring at a screen for extended periods of time can give you strained, dry eyes and headaches. We often are not sitting with proper posture, causing neck and shoulder pain. The blue light from our screens also suppresses melatonin, affecting our ability to have a restful sleep. The main solution to these problems is to reduce screen time and increase movement. We cannot always reduce our screen time, as we strive to complete our classes and homework, but there are things we can do to give our eyes a break. Our professor Valerie posted a link to an excellent app called “Love My Eyes” that sets a timer to remind you to look 20 feet away, for 20 seconds, every 20 minutes. If you are able, getting up and walking around for a quick break (perhaps when your camera is off but with Bluetooth headphones) to look around and move your body. See if you can get a standing desk or move your work station to your kitchen counter for a bit. I am currently hunting through Used Victoria and other sites to find a kneeling chair, to improve my posture.

Zoom is an excellent platform without which online school would be incredibly difficult, and for that I am thankful, however I need to find the right balance for myself. I am going to do my best to implement my plans and hopefully reduce my Zoom and screen time fatigue.


A cool tech learning tool I learned this week was how to use Twine! It is a fantastic tool for telling interactive, non linear stories. We received a tutorial in EDCI 352 from Rich McCue, and with his attached outline it was quick and easy to learn. Rich started by showing this amazing story board that his daughter had done about Chinese Immigration to Canada for a school project. It was so intricate and detailed, yet so easy to follow. I mapped out a silly story about a salamander named Larry so that I could quickly practice adding new passages. It felt like a simple version of coding. We learned how to bold, italicize and underline text, add pictures, videos and music, change background colours and add links to other websites into our stories.

This will be such an excellent tool to use in the classroom as a way to map out concepts or present projects in a fun and interactive way! It is well suited for highschool students, as it is an easy to use platform while increasing their tech literacy. I am going to try to use this program for a project in my teaching career as a new way to interact with my peers while online. One of the challenges with this program is that it can be difficult to save and share the story. There is no way to have it automatically saving to a cloud, so if you accidentally close your browser or your internet cuts out, all your progress will be lost. Overall it is a great tool, and I look forward to utilizing it in the future.


A Brief History of Pottery

To start expanding my knowledge of pottery, I decided to research its origins and path throughout history.

I began with a quick search of my favourite podcast “Stuff You Should Know” hosted by Josh Clark and Charles W. “Chuck” Bryant to see if they had covered this topic. Unfortunately, they have not, but there is an excellent article on their home site HowStuffWorks called “How Pottery Works” by Emilie Sennebogen. The podcast and website are excellent ways to learn about a new topic, as information is shared in an engaging way. They employ humour and well researched, cited material to entertain and educate.

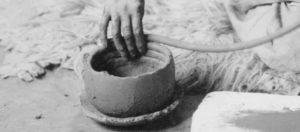
Pottery most likely started during the Neolithic Revolution, as hunters and gathers started to settle, farm and raise animals. They needed a storage solution that was better than a woven basket, especially for storing liquids. Clay is a common substance found around the world and it is easy to give it a basic shape by hand. Pottery was most likely discovered by accident, as someone left a chunk of clay in a large fire. The first forms of pottery were pots made from coils of clay built up from a circular base, smoothed out by hand and baked in a large bonfire.

Person is making a bowl by the coiling technique of pottery. About half of the pot has been made and smoothed out, and you can see some of the last rings of coils as they snake the next coil around the pot.

Coiling technique, photo by Andy Ward

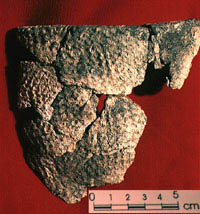
The oldest ceramics found in Canada were from northern Yukon, and it is guessed that it was introduced around 1500 BC. They have similar designs and styles to the Siberian Neolithic. Ceramics did not however spread south from Yukon. Other artifacts in eastern Canada during this time period most resembles pieces found in Ohio and Illinois. Because of these implications researchers are able to us pottery to understand how populations travelled. Coiling techniques among North American Indigenous peoples were similar to those used in other cultures. Later, there is evidence that they used woven molds as a template. The coils of clay would be built around these molds, and then the outside would be paddled to smooth out and thin the walls of the container.

Fragmented pottery made by Sioux, colour is a light brown with lots of texture on the outside of the pot. The background of the image is red.

Pot made by Sioux, photo by Jean-Luc Pilon

Fragments of an old piece of pottery recovered from Engigstciak site in Northern Yukon. It is golden brown in colour, in about 10 pieces loosely connected. There is a pattern on the outside that looks like a basket imprint. The background is red.

Recovered from Engigstciak site in Northern Yukon, photo by Jean-Luc Pilon

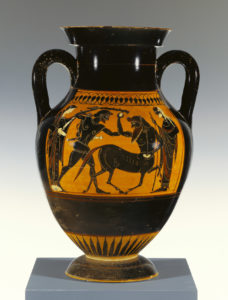
The next best invention in the world of pottery is the potter’s wheel. Prior to this, pottery built by hand was never perfectly round. It is most likely that around 3000 BC a basic revolving wheel, pushed by hand, was invented in Mesopotamia. The Greeks are attributed for establishing pottery as an art form. They were the first to introduce beautiful designs and colours through ingredients like ochre and potash. Over time, technological advancements like the electric wheel and better kilns allowed for more artistic expression along with practicality.

Large Greek storage jar, there is a motif on the central band of the jar showing a Greek man fighting a centaur, with two individuals flanking them. The background on the pot is a warm orange, and the characters are in black. Most of the pot including the handles and base are also black.

Greek storage jar, from J. Paul Getty Museum

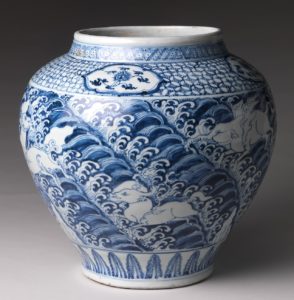
There are three types of clay in pottery: earthenware, stoneware and kaolin (or white). Earthenware is the most common, and most likely to be what the first potters used. I use this type of clay in my pottery.  Earthenware clay is porous and therefore needs a sealing glaze to be food safe or water proof. Stoneware is more robust and is fired at a higher temperature. You do not need to glaze this type as the high temperature turns it into a glass like substance that is water proof. Kaolin clay makes porcelain. It is much less elastic, making it more finicky than the other two types, but makes beautiful, delicate pieces.

Ming dynasty porcelain jar, blue images of waves and animals on a white background. The decoration is very intricate and delicate.

Ming dynasty porcelain jar, public domain

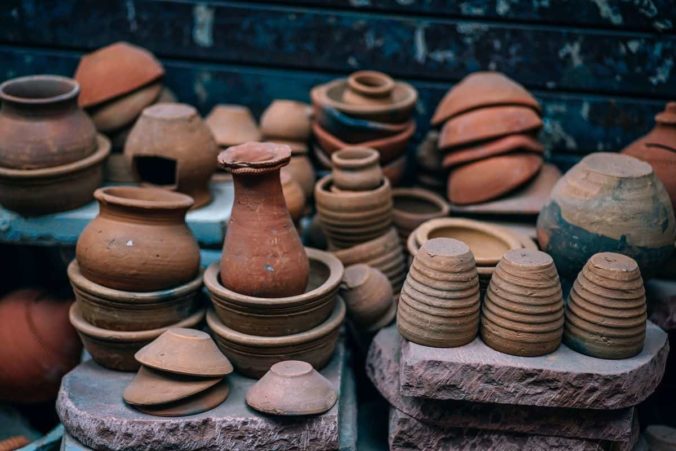
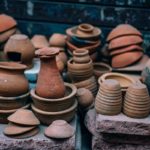
Multiple stacks of plates, saucers and flower pots made from earthenware clay, terracotta coloured on blue and red tables.

Earthenware, photo by Peter Deneen

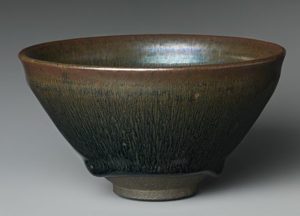
Bowl made from stoneware, colours include green, brown, blue and yellow that have melted and melded together. The bowl is very well shaped and smooth.

Stoneware, from Edward C. Moore Collection


Pottery can be an expression of creativity, or a way to make a practical tool, but it is often a combination of both. This week, I decided to focus on the history of pottery, next week I am going to start throwing some pieces  to begin my first goal, plates and flower pots.

Resources:

Gascoigne, Bamber. “History of Pottery and Porcelain.” History World. http://www.historyworld.net/wrldhis/PlainTextHistories.asp?historyid=ab98

Sennebogen, Emilie. “How Pottery Works.” howstuffworks. https://home.howstuffworks.com/green-living/pottery1.htm

Birch, Samuel. (2015). History of Ancient Pottery. Cambridge University Press.

Pilon, Jean-Luc. “Pottery-Making Techniques”. Canadian Museum of History. https://www.historymuseum.ca/cmc/exhibitions/archeo/ceramiq/cerart5e.html

My First Stab at Reflection within EdTech

Hello and Welcome Friends!

I’ve never had a blog before, and most of my experience reading them is when searching for new cooking recipes. To be honest, it drives me nuts when I find this amazing recipe for a new buddha bowl or stir fry but I need to scroll through endless text about how they dropped their kid off at soccer practice that day before they show the recipe. Most of the time though it is worth it if I get to make a new yummy dinner, and some of the most verbose bloggers have the most delicious ideas. I spent so much time last week watching youtube tutorials about wordpress and exploring my blog that I forgot to make a post! So apologies that this one is late, but I would like to reflect on September 11th’s class and our homework for the week.

The course started off pretty intense, with what felt like a list of 50 tasks and apps and new software to explore. Once I got down to the list though it quickly felt less intimidating as I slowly checked off each item as I set up Twitter and all the others. I am also excited about the pass/fail aspect of the course, as the stress of wanting an A is off your plate. This will be a great example of the work you put in will be the skill and knowledge you get out.

I really enjoyed watching the movie “Most Likely to Succeed” this past week. When the movie started, it sounded a bit hokey. No exams, no tests, no classic lecture sounds pretty wild to me. How were the kids going to get any learning done, or be knowledgeable enough in university? As the movie progresses however it started changing my opinion. The kids were so engaged in their classes and were excited to learn! Their teachers were so passionate about the subject material, and helping their students develop their “soft skills” like teamwork and confidence. I teared up at the end when the young boy after weeks of trying finally got his piece to fit. One critique I would have with that style of schooling however is the costs associated. Those students were working with very expensive equipment and technology that is not available in the budget of public schooling. It’s amazing to see them so engaged, but we as teachers would need to find creative methods with a lower price tag to truly include this in the public system.

That’s all for this week folks! To learn about my Free Inquiry Project, please head over to my Pottery Project tab, and if you would like to learn a bit more about me and my path to teaching please check out the “About Me” section of my blog. In the interest of striving to be more multimodal and to give everyone a smile, here’s a short clip of a dog who is SO EXCITED to eat their dinner 🙂

Here’s a blog of a woman who has awesome recipes without too much chatting:

« Older posts Newer posts »